I just wanted to pop in and wish everyone a Merry Christmas/Happy Holiday! I'm taking a little blog break for the day and spending time with my family. I will catch up on all of your posts first thing in the morning. I hope all of your Christmas wishes came true this year and you have a great day with family and friends. Wish me luck I'm cooking my first Christmas dinner! Eeek!
Showing posts with label Christmas. Show all posts
Thursday, December 25, 2014
Wednesday, December 24, 2014
ABC's of Christmas (part two)
(If you missed the first half of the list, click here to catch up!)
N is for...Naughty or Nice.
Which list do you think you are on this year?? I would like to think that I made the nice list
O is for...Open Fire.
As in: "chestnuts roasting on an open fire..." If I'm outdoors in the winter than I love nothing more than a big bonfire and a hot cocoa in my hand.
P is for...Poinsettia.
I think they are so beautiful! Around her when everything gets covered in snow and the trees have no leaves, it's great to be able to have something bright to cheer up the gray days. Although, not a good idea to have one around if you have pets! They are poisonous!
Q is for...Quilt.
My grandma-in-law (is that a thing??) made us a Christmas quilt on our very first Christmas together. It is absolutely gorgeous! I make sure to bring it out every year but I never end up using it because I don't want it to be ruined
R is for...Reindeer.
I mean, you have to have the reindeer! And if you have reindeer then you have to have....
S is for...Santa!
I mean, duh! haha! I was a little worried that Paige would pull off his beard when we put her on his lap but she didn't. She's so curious and misses nothing so I knew she would notice the fake beard. She stared at it but didn't do anything.
T is for...Tree.
One of my favorite things to do when I'm getting ready for Christmas is set up the tree. We've always had a fake tree...I don't think I would even know what to do with a real one! lol
U is for...Unwrapping presents.
I LOVE buying gifts for people. A little too much if you ask my husband. haha! Nothing is better than picking out the perfect gift for someone and seeing their face light up with joy.
V is for...Visiting.
Even tho I mentioned earlier that it is exhausting to travel around and see everyone on Christmas, I also think that is part of what makes the holiday special. There are some family members that I only get to see on holidays! So that is why we are still going to make our rounds on Christmas Eve....and I also told everyone they are more than welcome to stop for dessert at our place on Christmas Day.
W is for...Wrapping presents.
My father in law is like a wrapping ninja! His presents always look so nicely wrapped. When I try.....well, it can get ugly! lol
X is for...X-ray vision.
Oh come on, you know you wish you had it too!! I am not good with surprises. I NEED to know what's in there. It's definitely fun to try and guess but I get kind of anxious waiting. haha
Y is for...Yule log.
I have always heard that if you burn a "yule log" it brings good luck in the new year, but for the first time this year someone told me it can also be a type of cake! Has anyone else heard of this??
Z is for...Zzzzz's.
After all the holiday fun and visiting is over, nothing is better than crawling up for a good night sleep. lol!
Tuesday, December 23, 2014
ABC's of Christmas (part one)
A is for...Angels.
Growing up, we always had an angel on top of our Christmas tree. My mom used to say that they are in memory of all of the people in heaven that can't make it to celebrate with us anymore, and to remind us that they are still with us.
B is for...Baking cookies.
Christmas cookies are a big deal around here. haha! My Aunt makes hundreds, if not thousands, every year. She sells trays of them and every thing. I love the ladylocks/ladyfingers. Yummm
C is for...Christmas Carols.
I've never actually seen or heard people going around town singing but we definitely sing and dance to them in my house. I've always loved Christmas music.
D is for...Decorations.
Go big or go home! haha! Just kidding! But I do love seeing everyone's beautiful decorations, lights, wreathes, etc.
E is for...Eggnog.
Apparently eggnog is a big deal at some people's houses. Honestly, I've never been a huge fan of it....It kind of grosses me out!
F is for...Family.
That's what the holiday is always about! We used to travel to everyone's houses on Christmas Day but this year we are doing it differently. We are doing our visiting on Christmas Eve and then Christmas Day is going to be spent at home with our little family. I can't tell you how excited I am about this. I want to actually be able to enjoy Christmas as a family rather than rushing around everywhere.
G is for...Gingerbread houses.
No matter how sloppy they are, they are still really fun to make.
H is for...Holiday movies.
If you saw my post yesterday, then you already know that holiday movies are a big deal to me. I will try to watch as many as possible every single year.
I is for...Icicle Lights
Every year on Christmas Eve we drive around town at night and look at all of the lights (while listening to Christmas music, of course). I feel kind of Grinch-y this year because we never got around to hanging our lights...boo!
J is for...Jack Frost.
Jack Frost nipping at your nose.... it's even part of a song! I think it would be hard for me to get in the spirit of Christmas if it wasn't chilly outside. It's usually REALLY cold at this time of year but this has been a strange weather year for us.
K is for...Keepsake Ornaments.
Since Paige was born I've been wanting to create different ornaments for the tree every year. I think it will be fun every year to see all of the different ones and take a trip down memory lane. Who knows, maybe I will even get to pass them down to her one day!
L is for...Laughter.
Christmas has always been one of those days of the year where it's okay to forget about everything going on and just be happy. That's one of the many great things about this holiday. I love getting together with family and letting lose, having fun, and just laughing all day.
M is for...Mistletoe.
This is another one of my favorite things. Maybe it's the romantic in me but I love it!
I will be posting part two tomorrow, so be sure to stop back!!
Monday, December 22, 2014
My Favorite Holiday Movies
I'm one of those crazy people that watches nothing but Christmas movies for the whole month of December. I usually try to watch them while my husband is working so I don't drive him too crazy, but we have a rule that the 2 weeks before Christmas are fair game. ABC Family is THE BEST for this too because they have soo many great Christmas movies. I also own a bunch because I am basically a 5 year old kid in a 30 year old's body. haha!
My absolute favorite will always be A Miser Brother's Christmas. It reminds me of when I was really little and looking forward to Christmas and Santa. I love the old claymation movies.
My BIG list of Christmas movies:
A Christmas Carol
How the Grinch Stole Christmas
Santa Claus is Coming to Town
Rudolph the Red-nosed Reindeer
Frosty the Snowman
A Year Without a Santa Claus
A Miser Brother's Christmas
Muppet's Christmas Carol
Mickey's Christmas Carol
Mickey's Once Upon a Christmas
Mickey's Twice Upon a Christmas
Nightmare Before Christmas
Elf
Home Alone
Scrooged
The Santa Clause
The Polar Express
Miracle on 34th Street
It's a Wonderful Life
White Christmas
A Christmas Story
National Lampoon's Christmas
Prancer
Charlie Brown's Christmas
Jack Frost
Fred Claus
Jingle All the Way
Santa Paws
Arthur Christmas
Shrek the Halls
Deck the Halls
A Chipmunk Christmas
Love Actually
Four Christmas'
The Holiday
The Family Stone
The Family Man
Just Friends
Sleepless in Seattle
You've Got Mail
Eight Crazy Nights
Christmas With the Kranks
Serendipity
While You Were Sleeping
Home Alone
Die Hard
The Nutcracker
Rise of the Guardians
Unlikely Angel
Holiday in Handcuffs
The Mistle-Tones
Christmas Cupid
12 Dates of Christmas
What's your favorite Holiday movie?
What ones did I miss? Let me know and I will add them... and watch them because I'm a crazy person. lol!
Friday, December 19, 2014
My favorite Christmas songs
I am a firm believer that music can really effect your mood. If I listen to sad songs I will be in a sulky mood for a while, but when I listen to happy songs, I can't help but smile and dance. That's what Christmas songs do for me. They really help get me into the Christmas spirit! I definitely have my favorites, but I enjoy listening to just about all of them. Although I must admit, there is one song I will change every single time it comes on.... "The Christmas Shoes". It's a beautiful song, it really is but MAN, does it bum me out and kill the mood for me.
My ultimate favorite song is: "Rocking Around the Christmas Tree" - Brenda Lee
If that song doesn't get you in the mood than I don't know what will!
A close second to that one is "Baby, It's Cold Outside". I just love how flirty and fun it is.
I will also listen to anything Christmas-y by Michael Buble, Josh Groban, Pentatonix, Bing Crosby, Frank Sinatra, and Dean Martin. Don't judge me! I'm all over the place!
What are some of your favorites??
Sunday, December 14, 2014
DIY Keepsake ornament + more
This is another SUPER easy ornament idea. If you've been around here for awhile you may remember me saying I'm a super sentimental person...and that I tend to save everything. I kept my daughter's little hat and the bracelet from when we had her in the hospital and could never decide what I wanted to do with them. I had them just sitting in a little shoe box for almost 2 years now. So instead of leaving it in a box forever I decided that displaying it on our tree every year would be really cute! Here's how I did it:
Step One: Take off the cap and start stuffing!
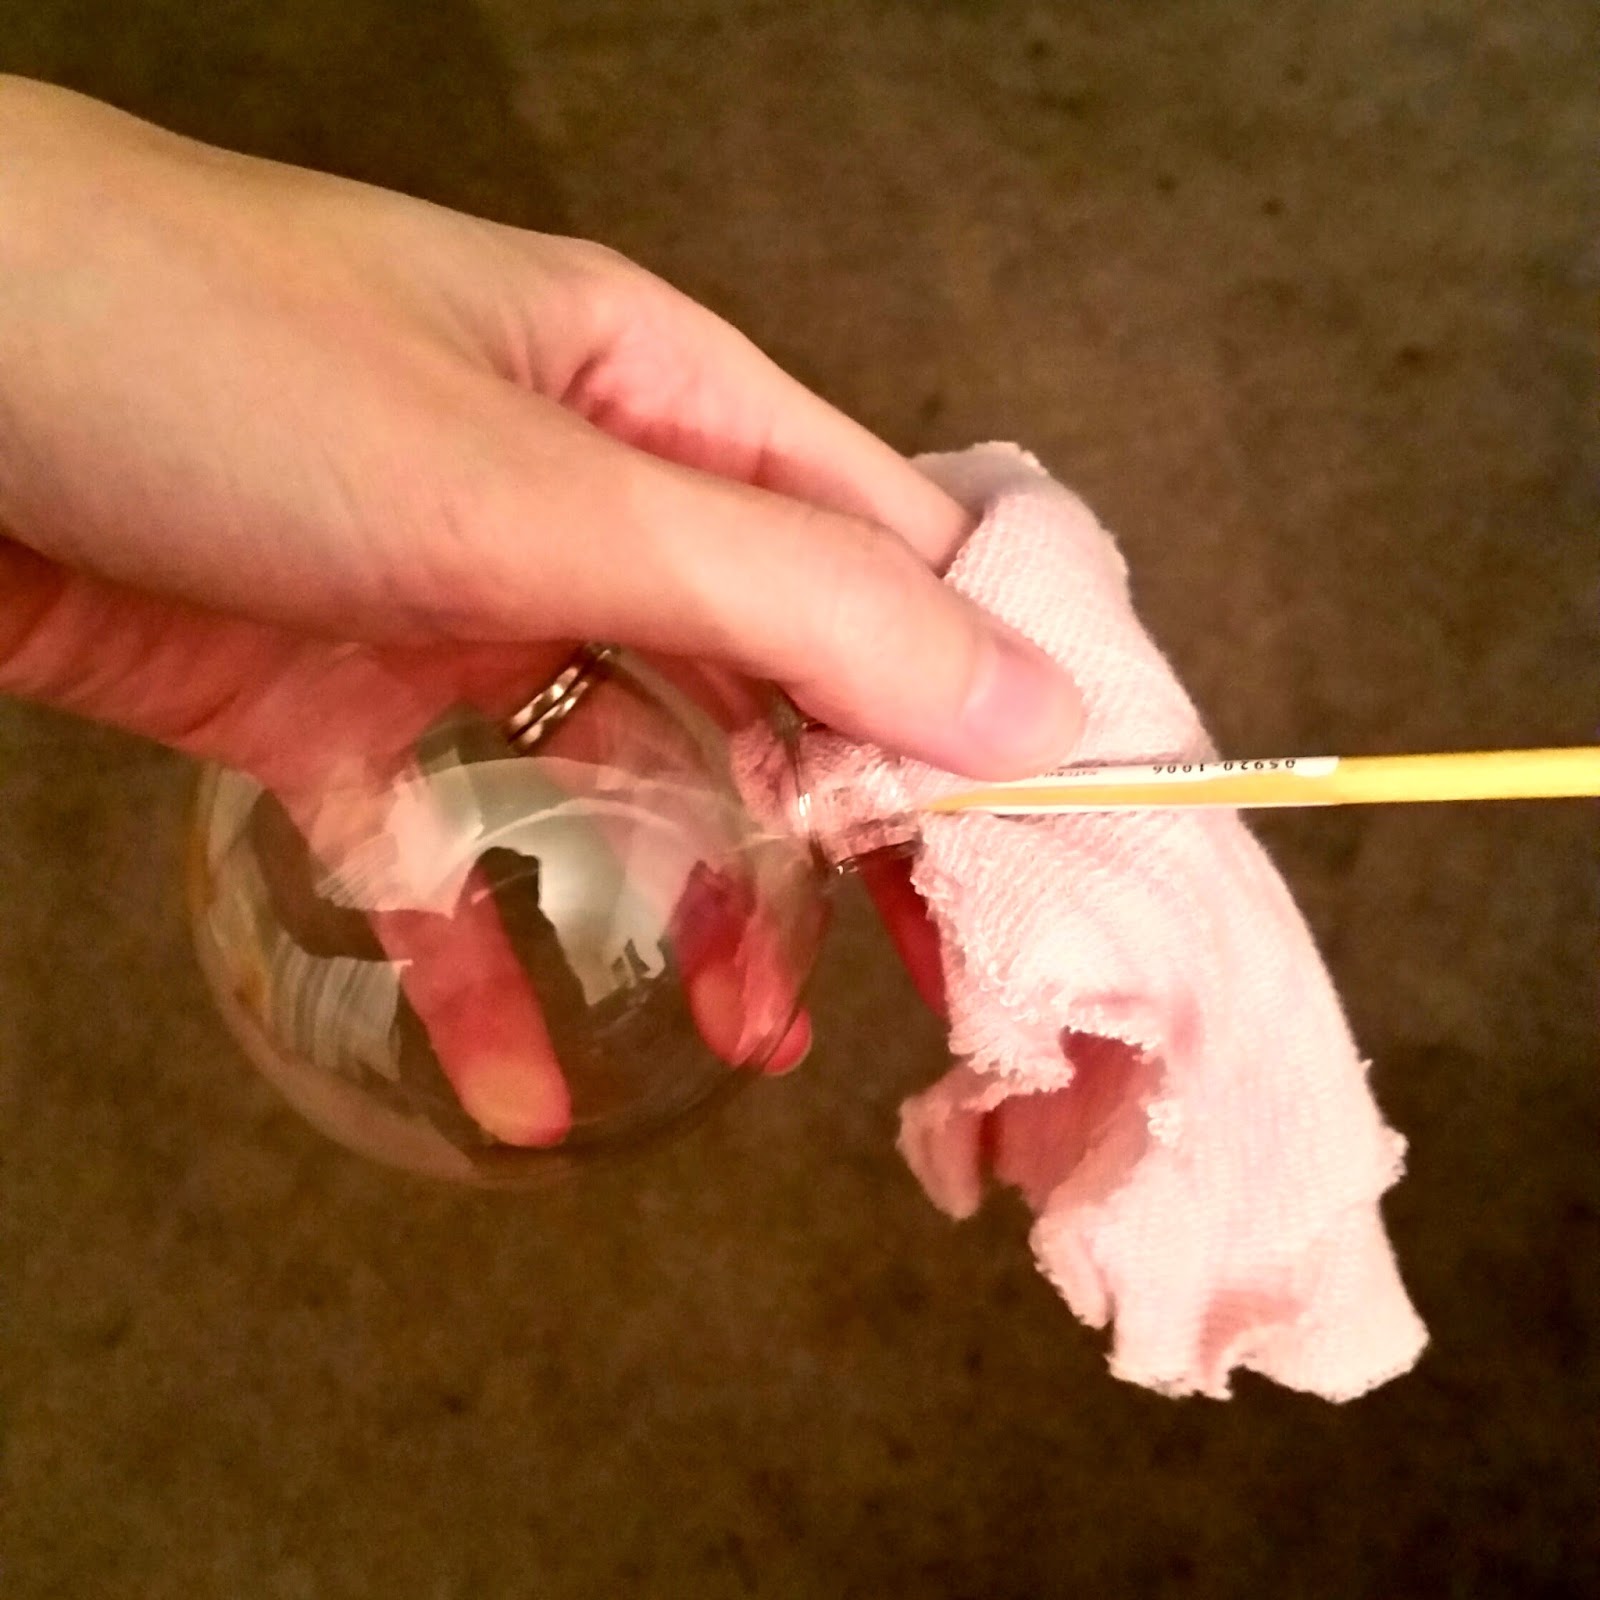
It really is just that easy. Take off the little silver cap on the top and start pushing the hat through the open area at the top of the bulb. I used the end of a paintbrush to push it all through. It can get kind of tough at some points but just keep working with it.
Step Two: Add the bracelet
Once you have the hat all the way in the bulb, you can start feeding the bracelet through. Cut it to the desired length or use the whole thing, up to you! You can use tweezers to position it better if you don't like how it is laying inside of the bulb.
Step Three: Replace cap and add ribbon for hanging
After you get the bracelet in the the bulb you can replace the silver cap and cut a small piece of ribbon for hanging it on the tree. Just knot it and you are all set!
AND THAT'S IT!! Super easy, right?! I loved the way it turned out, and it finally gives me a way to display just an adorable little keepsake.
I also did a few other super easy ornament tutorials if you want to check them out!!
Don't tell my hubby, but I've been painting some surprise ornaments for him for the tree. He is a HUGE Star Wars/Comic Book nerd so here is what I've painted so far.... What do you think??
from top left: Yoda, Iron Man, C-3PO, Spiderman
I have a bunch more that I would like to do, but we will see what I have time to finish.
Hope you're having a great weekend!!
Thursday, December 11, 2014
My Christmas Wishlist
Clockwise from large photo: Herringbone Vest / Chloe + Isabel Necklace / Younique Fiber Lash Mascara / Express Gift Card / Naked Eye Shadow Palette / Scuba Leggings
Can I also add my dream home, a vacation with just my hubby and I, and a job that I love?!
Hey, a girl can dream, right?! What are you wishing for this year?
Monday, December 8, 2014
"Oh Christmas Tree, Oh Christmas Tree!!..."
Over the weekend my husband and I decorated the tree together. I'm super dorky about it and have to put on Christmas music to get me in the mood. My hubby usually makes us hot chocolate too, but this time, we had a bit of a rough day (our ceiling in our bathroom started leaking, we got a flat tire while out Christmas shopping, and we just got our big fat bill in the mail for some of my health issues I've been having), so he decided a couple of beers were in order....because sometimes you just need a beer! We still ended up being able to enjoy our night and get in the Christmas spirit.
Before you see our tree pictures, I should probably tell you that we decided to put it in our kitchen this year. My daughter will be 2 in February and we knew she would never leave the tree/bulbs alone if it was in the living room. Or even worse, she would pull it over on herself. We have a baby gate that stops her from getting into the kitchen, so we thought both Paige and the tree would be safer in there.
Sooo I may have gotten a little carried away with the Christmas presents... All of these presents are for Paige. I got so excited and just kept grabbing things.
Oh, and if you take a picture of a Christmas tree you have to include a picture of it all lit up too! I included pictures of a few of my favorite decorations on the tree too!
We took Paige to Overly's Country Christmas to see all of their pretty Christmas lights. She also got to see Santa! She still doesn't really understand it much yet, but she didn't cry, so that's a plus! I was a bad blogger and didn't take any other pictures than this one. Oops!
I hope you all had a great weekend!
Friday, December 5, 2014
DIY: Mickey Mouse Ornament
I wanted to do another really simple ornament. If you've been around here for a while then you may have heard me mention that my daughter is absolutely OBSESSED with Mickey/Minnie Mouse. Remember when I painted those pumpkins?? Well, I decided that I wanted to make her a special little ornament to surprise her in the morning (I do my crafts after she goes to bed at night).
This one took me only about 5-10 minutes...and most of that time was just me hunting down the few things I needed. Don't you hate when you clean and lose track of where everything is?! I have an organized mess, so when I finally get around to straightening up, I get so confused and forget where I put things. lol! Anyway, here's a really easy Mickey Mouse ornament for all you Disney lovers!
Supplies needed:
Red shiny bulb
Black permanent marker
2 white buttons
Scissors
White ribbon
Elmer's Glue (Super glue would probably be even better!)
Step One: Coloring
Pick a spot just above the middle of the bulb and draw a straight line all the way around the bulb. It's okay if it's not perfect. Mine wasn't either! Now, you are going to color in the entire top half of your bulb. This will be his body. It may be a little streaky. That's okay!
Step Two: Creating his "shorts"
Apply glue to the back of each button and apply them one by one just below your black section. It's going to look a little sloppy but the glue will dry clear so don't worry too much about it. You will need to hold them in place for a minute or so and blow on them so they "set" a little bit. After that you can use pens/pencils to hold the bulb in place to let it dry. (see picture below)
Step Three: Finishing touch!
The last thing you will need to do is to attach a ribbon for hanging.... and that's it!! Not so bad right?!
If you enjoyed this post, you may also like:
DIY: Wedding Invitation Ornament
Have you ever made ornaments for your tree?
Thursday, December 4, 2014
90 Stocking stuffer ideas for him
I brainstormed a little bit, and came up with 90 different stocking stuffer ideas! It took me quite a while to come up with this list, and I tried to include various hobbies/types of things in my list. Let me know what you think!
- canned nuts
- gift card
- golf balls/tees
- guitar picks
- drum sticks
- guitar strings
- ear buds
- drill bits
- leveler/sanding block
- beef jerky
- candy
- deck of cards
- tie
- socks
- underwear
- pocket knife
- armour all wipes
- car air freshener
- car ice scraper
- tire gauge
- mini flashlight
- grill brush
- bbq/hot sauce
- tape measure
- stud finder
- duct tape
- power strip
- flash drive
- memory card
- batteries
- video game
- movie tickets
- DVDs
- gloves
- scarf
- wallet
- money clip
- belt
- belt buckle
- cufflinks
- pocketwatch
- bandanas
- undershirts
- shoelaces
- cologne
- shaving creme
- razors
- chapstick
- comb
- body wash
- loofah
- shampoo
- deodorant
- fishing lures/tackle
- ammo
- animal calls
- hand/boot warmers
- compass
- weight lifting gloves
- waterbottle
- mini first aid kit
- icepack
- hand sanitizer
- book
- book light
- coffee mug
- travel mug
- keychain
- key covers
- desk supplies
- lighter
- cigars
- bottle opener
- shot glass
- mini bottles of booze
- koozies
- ornament for tree
- mini photo book
- lottery tickets
- lint roller
- bungee cords
- sports cards
- collector coins
- novelty ice trays
- mini lego kits
- back scratcher
- hot chocolate packets
- "open when" letters
- massage oil
- personal coupons
What do you think of this list? What are some other ideas that you have for a man's stocking?
Labels:
Christmas,
for men,
gift ideas,
holiday,
list,
stocking stuffers
Wednesday, December 3, 2014
DIY Wedding Invite Ornament

This year I've decided that I want to start making a lot of the bulbs on our tree. We normally have a blue, silver, and white theme but now that my little one is getting older I want to add personal ones to the tree that I can pass down to her. I also wanted to start the tradition of making one together every year. I have a more kid friendly one scheduled coming up, but I wanted to share an easy one first!
I'm a bit of a hoarder, so I still have a lot of our wedding (from 4 and a half years ago!) mementos and decor in boxes in the basement. I've been trying to find ways to use some of them. Remember my DIY Wedding Card Album?? Well, I have a bunch of wedding invites that were extra still sitting in a box and wanted to find a way to use them. So, I got the idea to make a cute bulb. This would also make a great Christmas present for a friend if you saved their wedding invite!
Supplies:
Wedding invite
Ribbon
Scissors
Pencil
Ruler
Clear glass bulb
Step One: Measure where you are going to cut the invitation
Flip the wedding invitation over and use your ruler to measure every half inch on top and bottom and make little dashes with your pencil. Connect your dashes by making a straight line across. This will be your guideline for the next step: cutting.
Step Two: Cut and Sort
Now you are going to cut out all of your little strips. If you have a paper cutter then use that, otherwise you can just use scissors like I did. After you finish cutting out all of your strips, you can start pulling out the ones that you want to use. I pulled out the pieces that captured the words that I wanted to see peaking through areas of the bulb. Unfortunately, I can't remember how many pieces I ended up using. Just use your own judgement. More pieces for a fuller bulb, less for a bulb that's not completely full.
Step Three: Curl the strips and start stuffing
Now that you have the pieces picked out that you want to use, you can start curling them. I simply winded them, with the print facing outward, around a pencil. Once you have it curled around the pencil, you can slide it off the end and start feeding it into the open end of you bulb. I would do this right away so you keep the tighter curl. Keep curling and stuffing until you have the desired amount of strips in your bulb.
Last Step: Finishing touches
Almost done! I cut a piece of ribbon and made a bow on the front of the bulb, and also at the top for hanging. And that's it! You did it! Really simple!
Optional extra touches:
You could add a little charm on the ribbon if you would like
At the very beginning you could paint the back of the wedding invite a pretty color (silver, gold, etc.) before cutting out your strips, to have the inside part have a little pop. (I didn't think of this until I was all done, Poo!! I bet it would look awesome!)
You could paint the silver cap at the top just to add a little something..
So what do you think?? Will you give it a shot?
Subscribe to:
Posts (Atom)