Image Map
Showing posts with label ornament. Show all posts

Sunday, December 14, 2014

DIY Keepsake ornament + more


This is another SUPER easy ornament idea.  If you've been around here for awhile you may remember me saying I'm a super sentimental person...and that I tend to save everything.  I kept my daughter's little hat and the bracelet from when we had her in the hospital and could never decide what I wanted to do with them.  I had them just sitting in a little shoe box for almost 2 years now.  So instead of leaving it in a box forever I decided that displaying it on our tree every year would be really cute!  Here's how I did it:

Step One: Take off the cap and start stuffing!

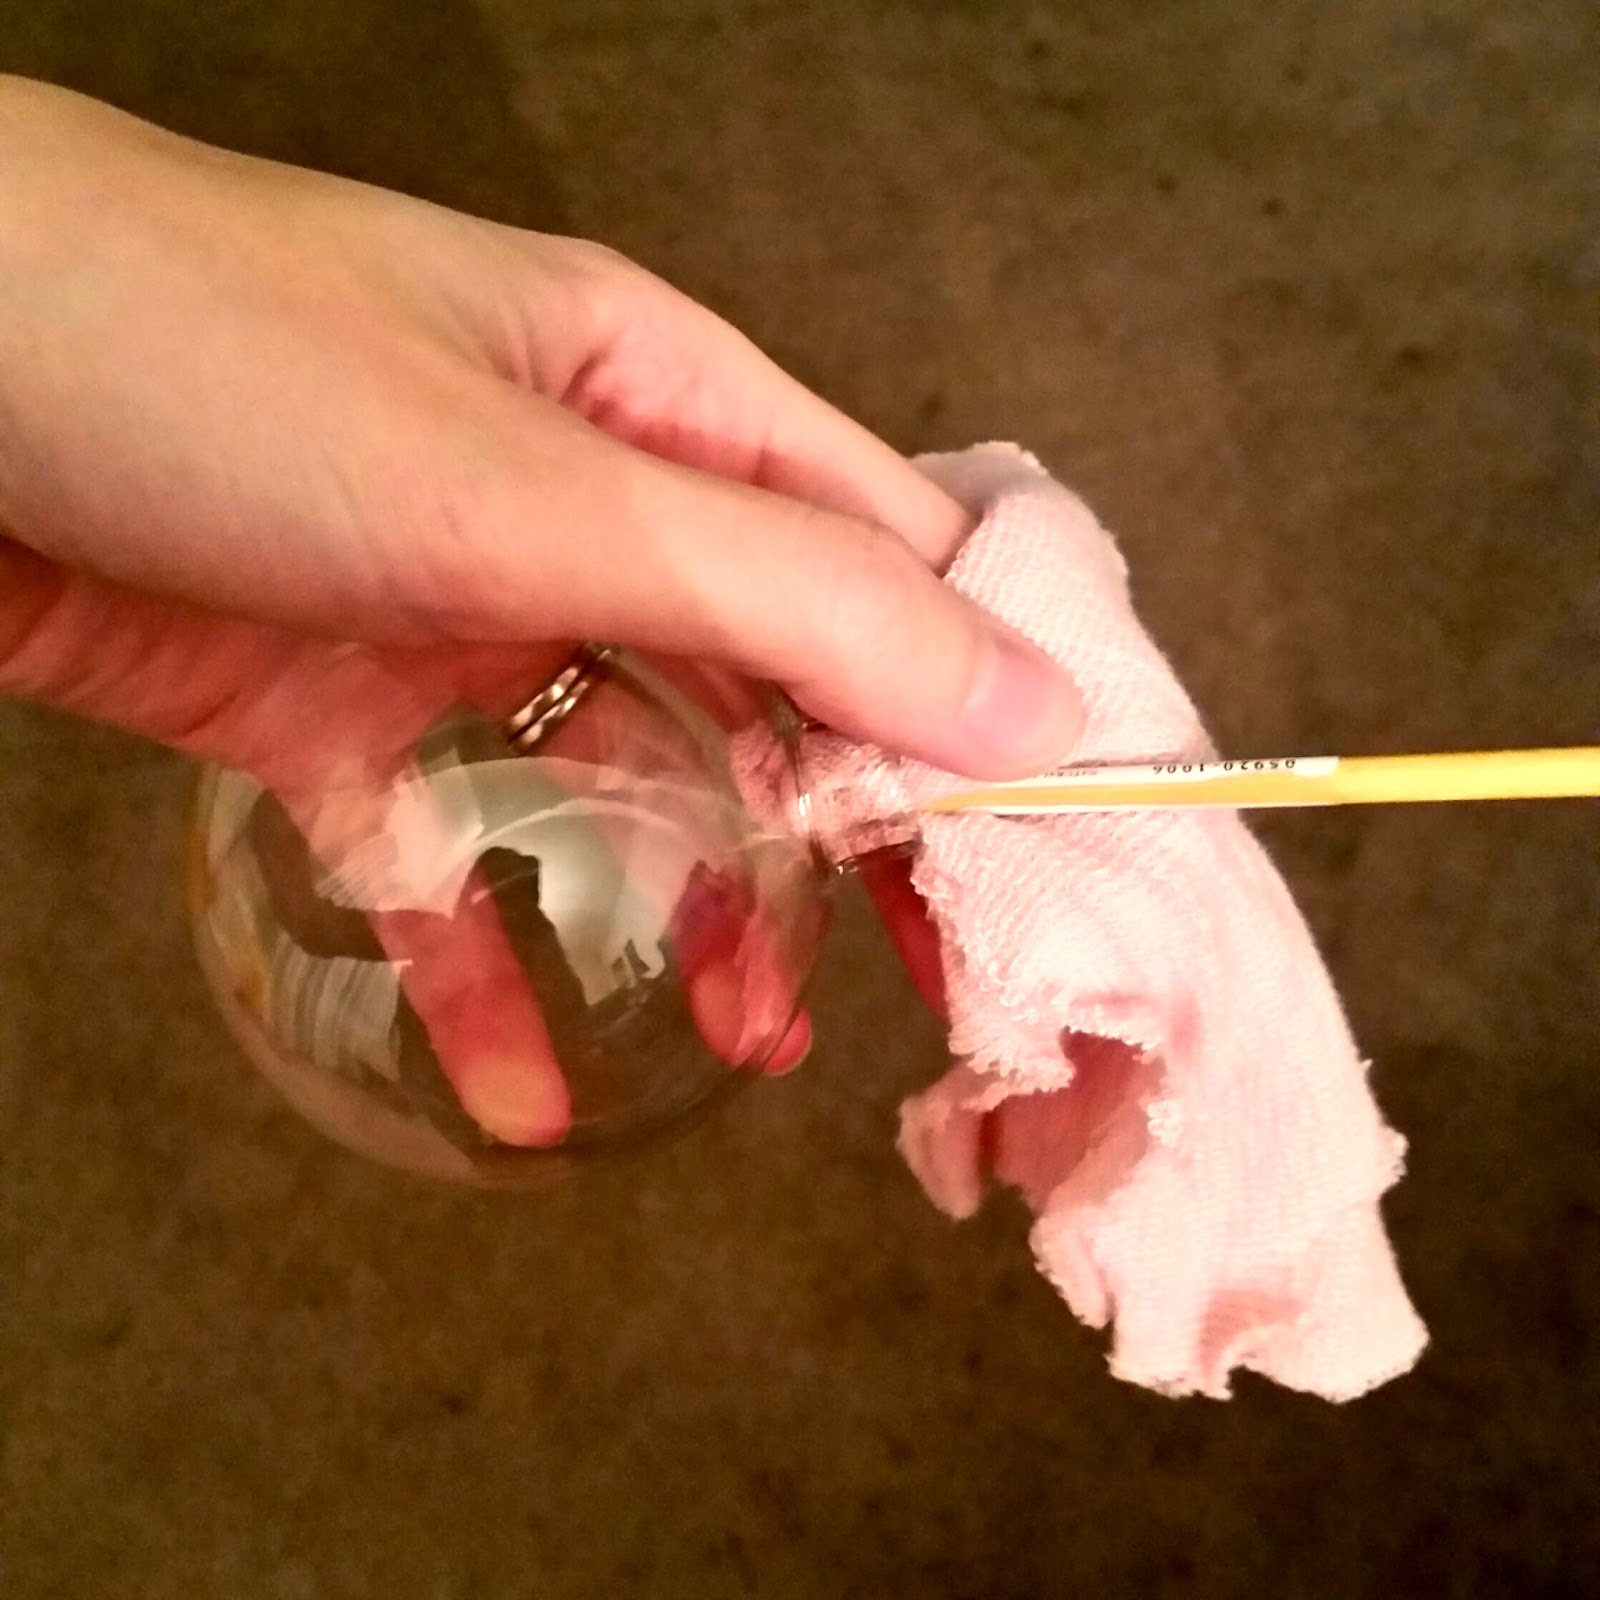
It really is just that easy.  Take off the little silver cap on the top and start pushing the hat through the open area at the top of the bulb.  I used the end of a paintbrush to push it all through.  It can get kind of tough at some points but just keep working with it.


Step Two: Add the bracelet

Once you have the hat all the way in the bulb, you can start feeding the bracelet through.  Cut it to the desired length or use the whole thing, up to you!  You can use tweezers to position it better if you don't like how it is laying inside of the bulb.

Step Three: Replace cap and add ribbon for hanging

After you get the bracelet in the the bulb you can replace the silver cap and cut a small piece of ribbon for hanging it on the tree.  Just knot it and you are all set!

AND THAT'S IT!!  Super easy, right?!  I loved the way it turned out, and it finally gives me a way to display just an adorable little keepsake.

I also did a few other super easy ornament tutorials if you want to check them out!!

Don't tell my hubby, but I've been painting some surprise ornaments for him for the tree.  He is a HUGE Star Wars/Comic Book nerd so here is what I've painted so far....   What do you think??
from top left: Yoda, Iron Man, C-3PO, Spiderman

I have a bunch more that I would like to do, but we will see what I have time to finish.

Hope you're having a great weekend!!

#Blogmas14

Monday, December 8, 2014

"Oh Christmas Tree, Oh Christmas Tree!!..."

Over the weekend my husband and I decorated the tree together.  I'm super dorky about it and have to put on Christmas music to get me in the mood.  My hubby usually makes us hot chocolate too, but this time, we had a bit of a rough day (our ceiling in our bathroom started leaking, we got a flat tire while out Christmas shopping, and we just got our big fat bill in the mail for some of my health issues I've been having), so he decided a couple of beers were in order....because sometimes you just need a beer!  We still ended up being able to enjoy our night and get in the Christmas spirit.

Before you see our tree pictures, I should probably tell you that we decided to put it in our kitchen this year.  My daughter will be 2 in February and we knew she would never leave the tree/bulbs alone if it was in the living room.  Or even worse, she would pull it over on herself.  We have a baby gate that stops her from getting into the kitchen, so we thought both Paige and the tree would be safer in there.


Sooo I may have gotten a little carried away with the Christmas presents...  All of these presents are for Paige.  I got so excited and just kept grabbing things.

Oh, and if you take a picture of a Christmas tree you have to include a picture of it all lit up too!  I included pictures of a few of my favorite decorations on the tree too!


We took Paige to Overly's Country Christmas to see all of their pretty Christmas lights.  She also got to see Santa!  She still doesn't really understand it much yet, but she didn't cry, so that's a plus!  I was a bad blogger and didn't take any other pictures than this one.  Oops!


I hope you all had a great weekend!
#Blogmas14

Friday, December 5, 2014

DIY: Mickey Mouse Ornament


I wanted to do another really simple ornament.  If you've been around here for a while then you may have heard me mention that my daughter is absolutely OBSESSED with Mickey/Minnie Mouse.  Remember when I painted those pumpkins??  Well, I decided that I wanted to make her a special little ornament to surprise her in the morning (I do my crafts after she goes to bed at night).  

This one took me only about 5-10 minutes...and most of that time was just me hunting down the few things I needed.  Don't you hate when you clean and lose track of where everything is?!  I have an organized mess, so when I finally get around to straightening up, I get so confused and forget where I put things. lol!   Anyway, here's a really easy Mickey Mouse ornament for all you Disney lovers!


Supplies needed:
Red shiny bulb
Black permanent marker
2 white buttons
Scissors
White ribbon
Elmer's Glue (Super glue would probably be even better!)

Step One: Coloring

Pick a spot just above the middle of the bulb and draw a straight line all the way around the bulb.  It's okay if it's not perfect.  Mine wasn't either!  Now, you are going to color in the entire top half of your bulb.  This will be his body.  It may be a little streaky.  That's okay!


Step Two:  Creating his "shorts"

Apply glue to the back of each button and apply them one by one just below your black section.  It's going to look a little sloppy but the glue will dry clear so don't worry too much about it.  You will need to hold them in place for a minute or so and blow on them so they "set" a little bit.  After that you can use pens/pencils to hold the bulb in place to let it dry. (see picture below)


Step Three:  Finishing touch!

The last thing you will need to do is to attach a ribbon for hanging....  and that's it!!  Not so bad right?!


If you enjoyed this post, you may also like:
DIY: Wedding Invitation Ornament

Have you ever made ornaments for your tree?

Wednesday, December 3, 2014

DIY Wedding Invite Ornament


This year I've decided that I want to start making a lot of the bulbs on our tree.  We normally have a blue, silver, and white theme but now that my little one is getting older I want to add personal ones to the tree that I can pass down to her.  I also wanted to start the tradition of making one together every year.  I have a more kid friendly one scheduled coming up, but I wanted to share an easy one first!

I'm a bit of a hoarder, so I still have a lot of our wedding (from 4 and a half years ago!) mementos and decor in boxes in the basement.  I've been trying to find ways to use some of them.  Remember my DIY Wedding Card Album??  Well, I have a bunch of wedding invites that were extra still sitting in a box and wanted to find a way to use them.  So, I got the idea to make a cute bulb.  This would also make a great Christmas present for a friend if you saved their wedding invite!


Supplies:
Wedding invite
Ribbon
Scissors
Pencil
Ruler
Clear glass bulb

Step One: Measure where you are going to cut the invitation

Flip the wedding invitation over and use your ruler to measure every half inch on top and bottom and make little dashes with your pencil.  Connect your dashes by making a straight line across.  This will be your guideline for the next step: cutting.


Step Two:  Cut and Sort

Now you are going to cut out all of your little strips.  If you have a paper cutter then use that, otherwise you can just use scissors like I did.  After you finish cutting out all of your strips, you can start pulling out the ones that you want to use.  I pulled out the pieces that captured the words that I wanted to see peaking through areas of the bulb.  Unfortunately, I can't remember how many pieces I ended up using.  Just use your own judgement.  More pieces for a fuller bulb, less for a bulb that's not completely full.


Step Three:  Curl the strips and start stuffing

Now that you have the pieces picked out that you want to use, you can start curling them.  I simply winded them, with the print facing outward, around a pencil.  Once you have it curled around the pencil, you can slide it off the end and start feeding it into the open end of you bulb.  I would do this right away so you keep the tighter curl.  Keep curling and stuffing until you have the desired amount of strips in your bulb.


Last Step: Finishing touches

Almost done!  I cut a piece of ribbon and made a bow on the front of the bulb, and also at the top for hanging.  And that's it!  You did it!  Really simple!


Optional extra touches:

You could add a little charm on the ribbon if you would like

At the very beginning you could paint the back of the wedding invite a pretty color (silver, gold, etc.) before cutting out your strips, to have the inside part have a little pop.  (I didn't think of this until I was all done, Poo!!  I bet it would look awesome!)

You could paint the silver cap at the top just to add a little something..

So what do you think??  Will you give it a shot?

Our Pretty Little Girls